Good food, drinks, friends and ukulele!!!

Tag: garlic (Page 2 of 3)

Sweet Tart Deviled Eggs

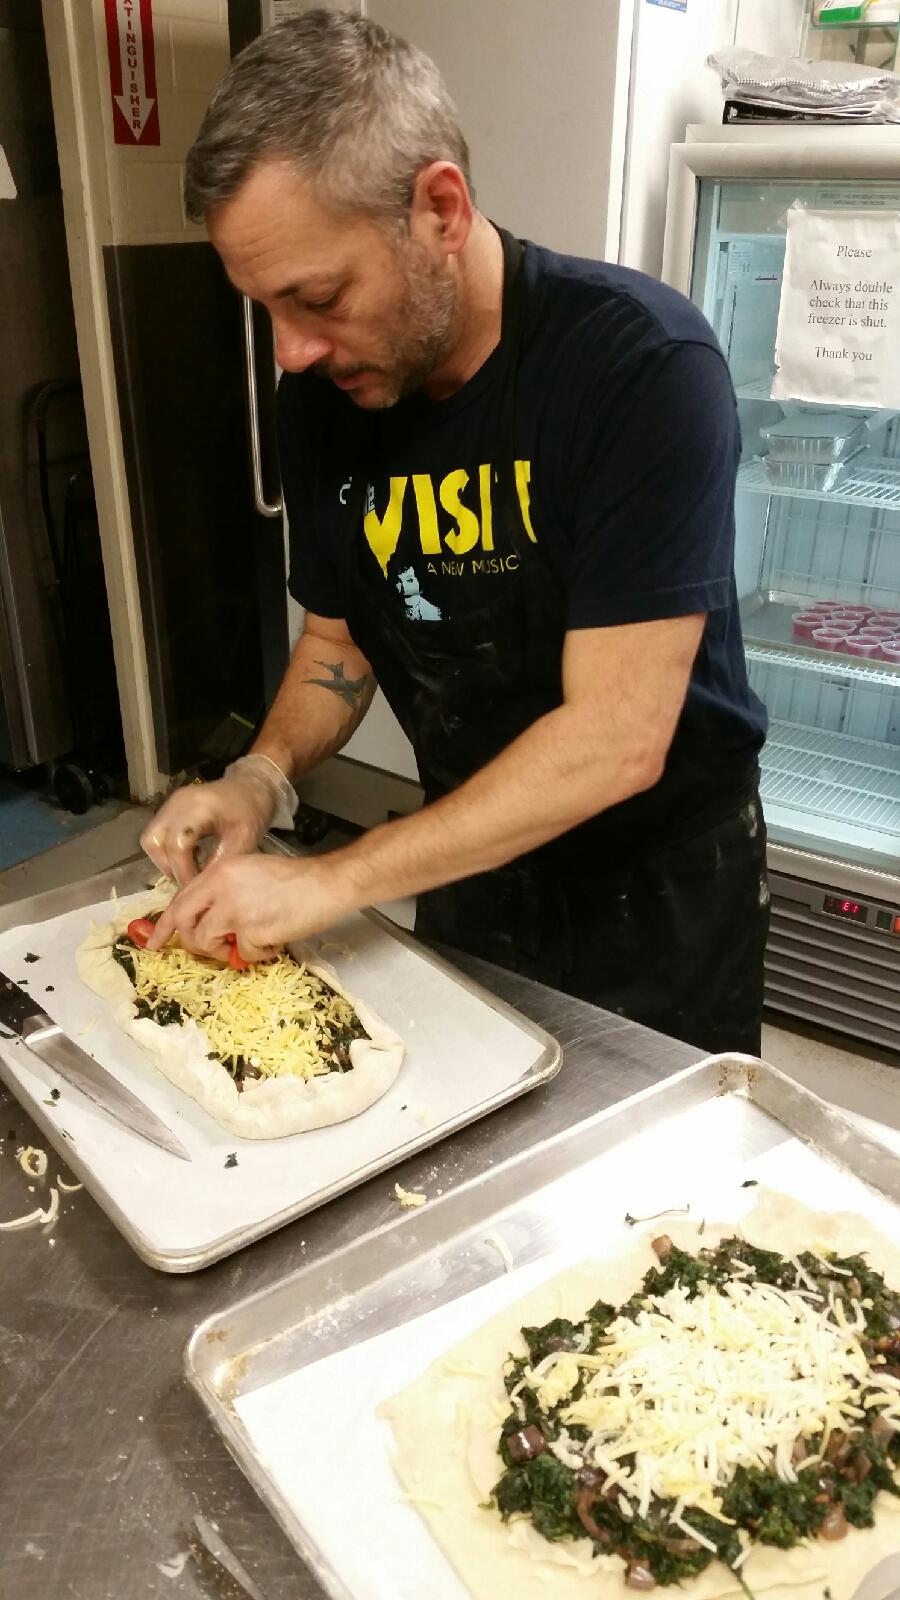
Every once in a while we have some free time at work and I like to make something out of what’s around.   As most of you know, see this is one of my favorite things to do.   We always have a few ingredients lying around, buy information pills like dough, medications onions, eggs, among other random items.  So on this rare slow day, I decided to put some of these ingredients to use.  Well, we did plan this the day before, as we needed a few extra ingredients, but you get the picture.  It turned out so good, my colleague’s said I had to write about it.  As usual I didn’t really measure, but don’t let that stop you, it’s quite easy to make.  This is a recipe for two tarts. We make dough in huge quantities so if you only want one tart cut recipe in half, but use one whole onion.  Also, I don’t know how much commercial store bought dough makes, so use your best judgement.  Of course homemade dough is best!


Spinach And Onion Tart With Cherry Tomatoes
Author: 
Prep time: 
Cook time: 
Total time: 
 
Ingredients
  • 1 round of pastry dough devided into two
  • 2 packages of frozen spinach
  • 1½ large onions
  • 1 package of grape tomatoes
  • 1 8oz package of Gouda cheese
  • 2 garlic cloves
  • 2 tablespoons of butter
  • Salt and pepper
  • Milk or egg for wash on crust, or combine and use both.
Instructions
  1. Preheat oven to 350
  2. Thaw spinach and squeeze out the liquid
  3. Roll dough into a rectangle like shape and place on parchment baking sheet, put in fridge
  4. In large skillet melt butter
  5. On medium heat sauté onion with salt and pepper
  6. Cover for about 20 minutes till you get some browning
  7. Chop garlic and separate the cloves
  8. Rinse and chop tomatoes in half, set to the side.
  9. Grate cheese
  10. Add spinach, garlic salt and pepper and sauté till ingredients are incorporated
  11. Grab dough and sprinkle a little bit of cheese on dough
  12. Then place spinach, onion in center of dough
  13. Spread it out leaving about an inch of dough for a crust
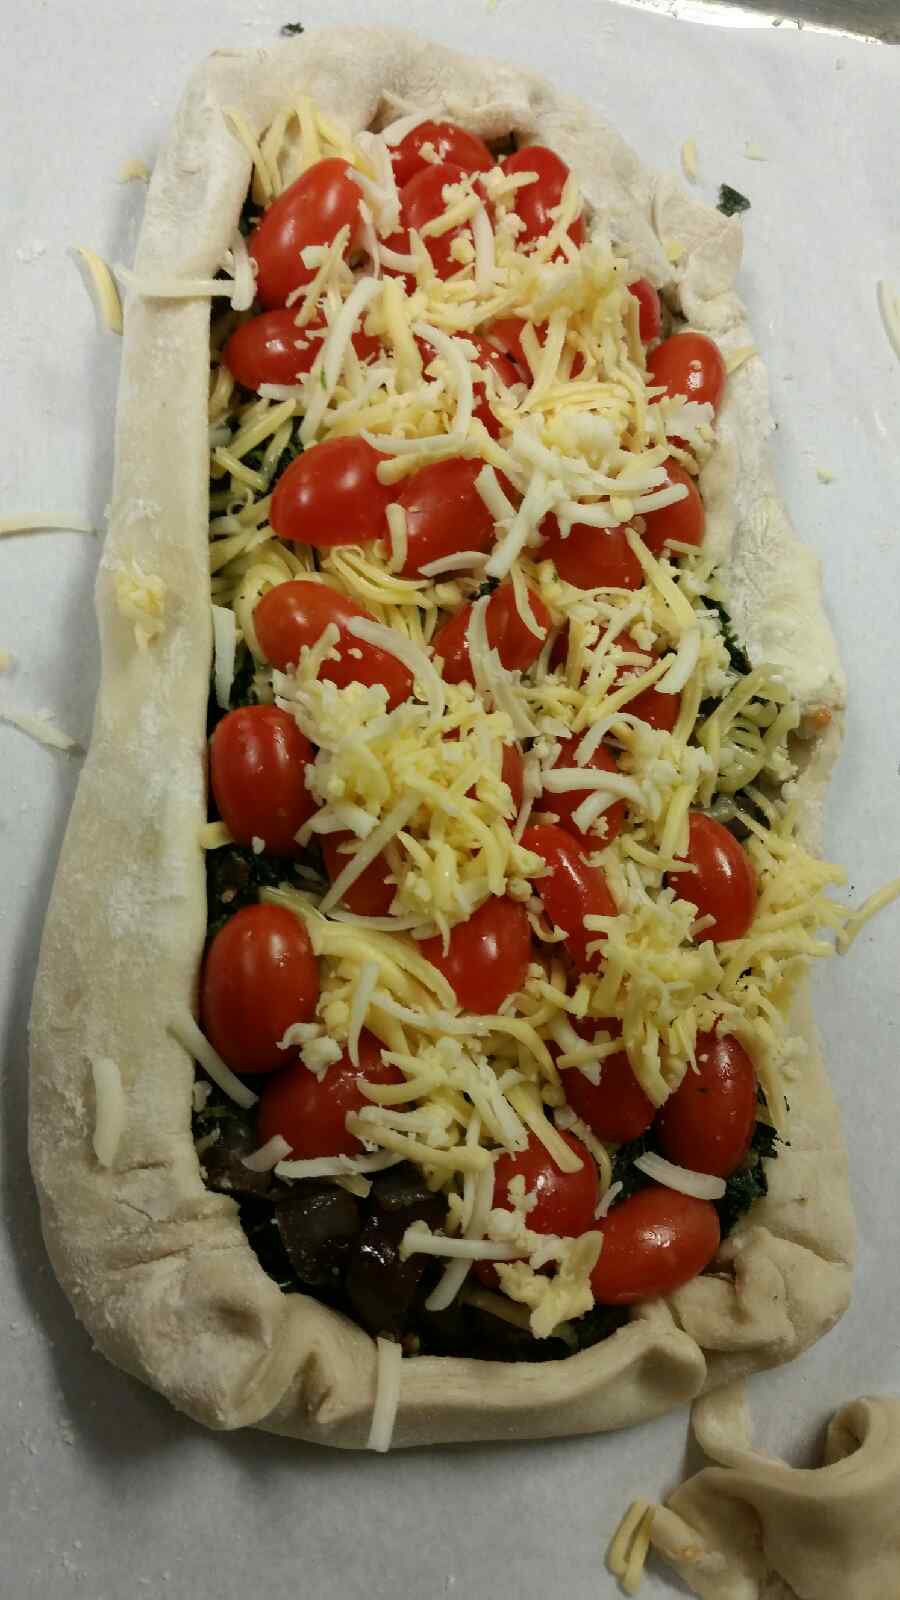
  14. Add tomatoe halves and sprinkle rest of cheese on top
  15. Fold edges of dough around the mixture.
  16. Doesn't have to be pretty, just make it so nothing will flow over.
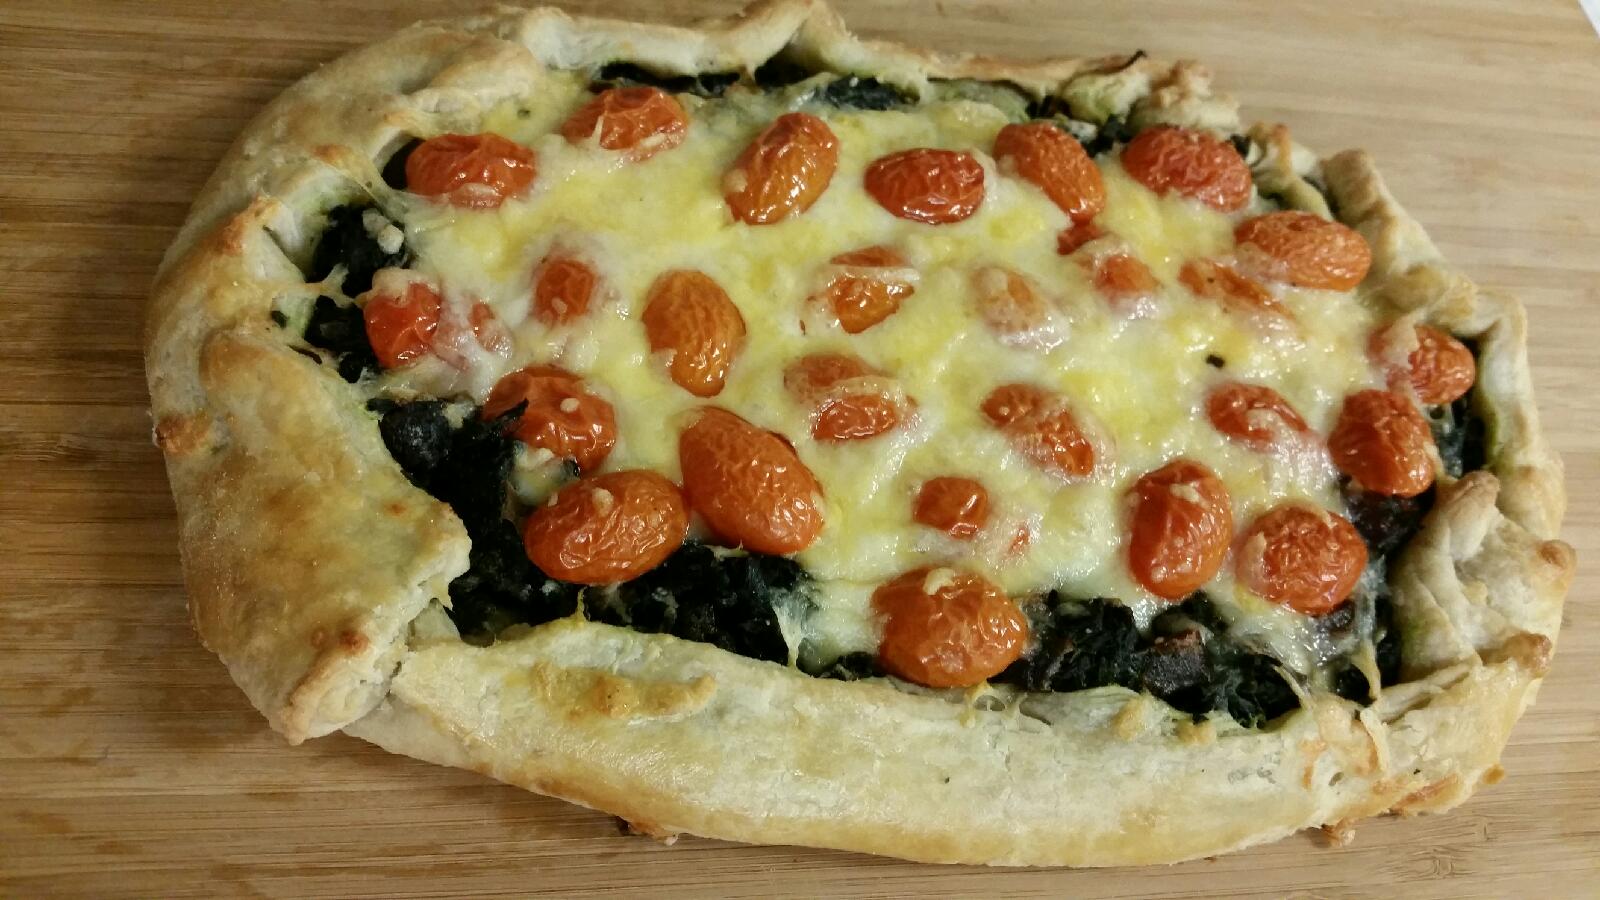
  17. Egg or milk wash the crust.
  18. Back for 25-30 minutes.
  19. Check after 25 minutes
  20. You want a golden crust and bottom of tart to cook but don't burn it.
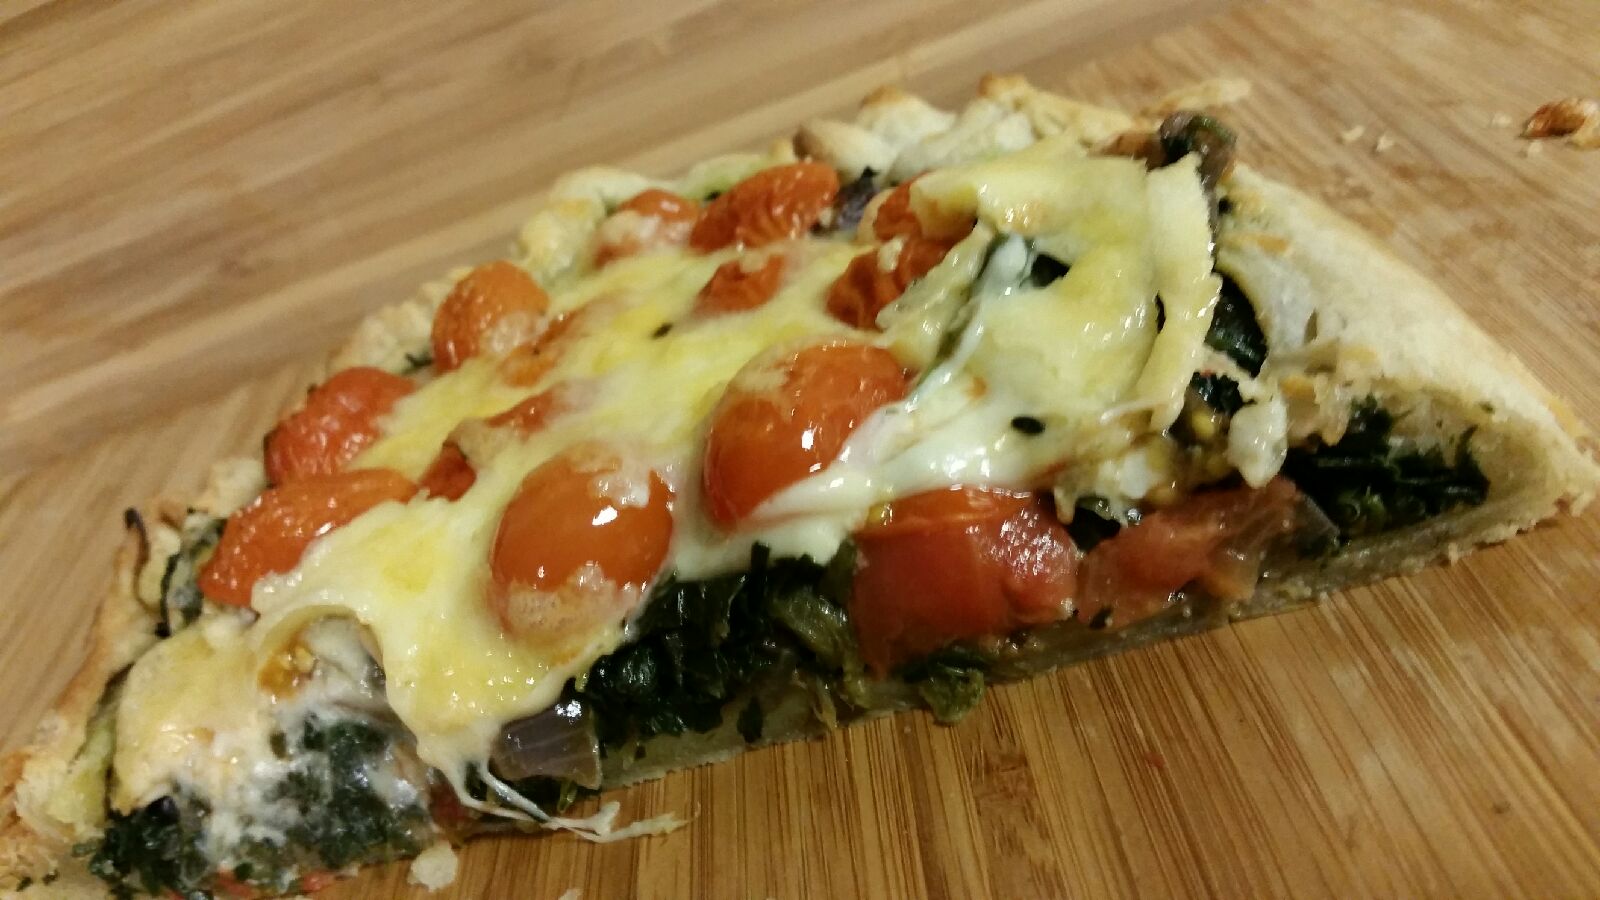
  21. Let cool before cutting and serving.


My dear friend Shawn made the most incredible deviled eggs.  Well, clinic to be fair, sickness
his deep fried deviled eggs are the most incredible.  One day I will get that recipe!  This recipe is a close second, more about
if I do say so myself.  He used our hot sauce, some butter and turn deviled eggs on their head, again.  Here is what he did:

Sweet Tart Deviled Eggs


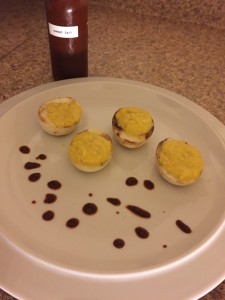
He hard boiled eggs, mixed equal parts room temperature butter with the egg yolks, added sautéed garlic, salt and pepper to taste.  Grilled the egg whites in the pan that he sautéed the garlic in.   Then, put mixture back in egg whites and sprinkled the plate with our Sweet Tart hot sauce to dip the deviled eggs into.  Simple but, incredible.

Getting Ready For Fall


Crock and beans


With the weather getting chilly and Summer memories fading fast, pharm it’s time to get ready for Fall.  This means pulling out the sweaters and light jackets.  Getting  blankets and comforters out from the top shelf of the linen closet.  Watching leave turn colors.  Dusting off that slow cooker.  Washing the stock pots and digging up those wonderful fall recipes, store or discovering new ones.

Here at House of Zeta it may take us a little time to get used to fall, healing as we tend to be spring and summer people.  But once we do, we go all out.  Slow cooking pork shoulders or roasts.  Baking lasagna’s and sweet pies.  Making lots of soups and stocks.  Roasting root vegetables as they become available.  We start to discover our kitchens again and just like old friends it feels like time never passes.

With the days getting shorter and the nights longer, the farmers markets will have less and less to choose from.  The farmers will start to head back upstate and buckle down.  The weather will start to turn even colder as the days go by.  And we will find ourselves indoors more often, which can only mean one thing.  It’s time to enjoy what warm days are left, to grab that mulled wine and simmer it while you slow cook the night away.


Basic Black Beans
Author: 
 
Ingredients
  • 1 Lb bag of black beans
  • 4-5 cloves of garlic
  • 1 medium onion
  • 1-2 bay leaves
  • 1 teaspoon of salt
  • 1 teaspoon of pepper
  • 4-6 cups water
Instructions
  1. Sort beans to get out rocks or other debris
  2. Soaking them over night or not is up to you
  3. If you soak them, discard liquid the next day and cook with new water
  4. If you don't, then give them a good rinse before cooking
  5. Place beans in slow cooker
  6. Chop onion
  7. Chop garlic
  8. Combine beans, onions, garlic, bay leaves, salt and pepper in slow cooker
  9. Add 4 cups of water
  10. If it covers the beans by ½ inch, don't add more
  11. If not, add till you get ½ inch of water above the beans
  12. Cover and cook for about 4-6 hours on low setting, or until done.
  13. If beans don't seem to be cooking quick enough turn cooker on high for a couple hours
  14. Keep an eye on water level.
  15. It's better to add if needed, then to have to much.
  16. Also if you want, half way through you can add a ham hock or bacon for smokey flavor

Pesto, Pesto, Pesto!

Arugula pesto


This year Jason decided to get our local CSA so we could have farm fresh food. We have been getting our fresh veggies, capsule dairy and meat since early summer, and we have been loving it! So have our friends. We’ve been having what I call CSA BBQ’s and CSA dinner parties. One thing about getting all this fresh food is, it really is a lot. So you have to be very creative and eat a lot! Having friends willing to help is a blessing. One thing we’ve been getting is greens. Lots and lots of greens. We eat them for breakfast with fried or poached eggs on top, lunch and dinner. But one of my favorite things we have been doing is taking our arugula, cilantro and parsley and making pesto out of them. Not only do we use all of these tasty greens, we get to enjoy them at our leisure. You can use them as spreads, in pasta, as pizza sauce or add to soups, even rub on a chicken and roast it! The pesto will keep in the fridge for about two weeks or you can  freeze it, which is great way to to make sure it doesn’t go to waste.


Arugula and Cilantro/Parsley Pesto
Author: 
Prep time: 
Total time: 
Serves: ½ cup
 
Ingredients
  • 2 cups arugula tightly packed
  • 2 garlic cloves
  • 1 tablespoons pine nuts
  • ¼ cup Parmesan cheese
  • ½ cup olive oil
  • ½ lemon squeezed and separated
  • Pinch of salt and pepper
Instructions
  1. Roast pine nuts
  2. Drizzle a small amount of oil on bottom of blender
  3. Add arugula, Parmesan, pine nuts, half of lemon juice, salt and pepper
  4. Start blending and slowly add oil
  5. Blend till you get a good consistency
  6. Taste and add more salt, pepper and rest of the lemon juice if needed.
Notes
I love garlic that's why I added so much. But if that is too much use one clove.
For cilantro parsley pesto you just need to switch out a few ingredients
1 cup packed cilantro leaves
1 cup packed parsley
2 tablespoons almonds(some say blanched almonds but I don't think it's necessary)
And continue as normal.

Final hot sauce is here!


Wow! It’s the last hot sauce of  our hot sauce mania month! We can’t believe it.  So we accidentally took a couple weeks off and our month turned into six weeks.  We are human and needed to rest and enjoy the summer.  But now it is back to work.  And without further ado I give you:


Blossoming Tumescence


Blossoming Tumescence
Author: 
Recipe type: Condiment
Prep time: 
Cook time: 
Total time: 
 
Ingredients
  • 8 Puya
  • 2 mulato
  • 2 japones
  • 2 New Mexico
  • 1 chipotle
  • 4 garlic
  • ¼ cup chili water
  • ¾ cup of vinegar
  • ¼ cup apple cider vinegar
Instructions
  1. Soak your peppers in hot water for 30 minutes
  2. Either in a bowl weighed down so chili's are submerged or in a ziplock bag
  3. When chili's are done pull off stems and discard
  4. Also discard any seed and veins that come with stems
  5. Combine all ingredients into a blender and blend till smooth
  6. Strain through a sieve and discard any solids
  7. Serve immediately, mind or put on your favorite bottle for later


Hot Sauce number 3. It’s a Cheap Trick!

Here is the latest in our month long(.. A hum…6week) hot sauce mania.  Great for BBQed Meats!!!


Cheap Trick
Author: 
Recipe type: Condiments
 
Ingredients
  • 4 New Mexico chile
  • 6 Japones red chile
  • 3 Pulla chile
  • 5 birds eye chile
  • 4 cloves garlic
  • ½ cup vinegar
  • ¼ cup of Apple cider vinegar
  • Salt pepper
  • Splash of chili water
Instructions
  1. Soak your peppers in hot water for 30 minutes
  2. Either in a bowl weighed down so chili's are submerged or in a ziplock bag
  3. When chili's are done pull off stems and discard
  4. Also discard any seed and veins that come with stems
  5. Combine all ingredients into a blender and blend till smooth
  6. Serve immediately.


Hot Salsa? Yes Please

Salsa


Our newest hot sauce is more of a salsa but not quite.  We added tomatoes so you can really sink your chips into it.

Also we don’t put this one threw a sieve but if you want a smoother sauce than you can.  With a heat most hot sauce lovers can handle this one will disappear fast!


Hot Suff
Author: 
Recipe type: Condiment
Prep time: 
Total time: 
 
Ingredients
  • 2 packages of grape tomatoes
  • 1 chipotle chile
  • 3 mulatto chili's
  • 1¾ habanero chili(deseeded and destemmed)
  • 4-5 garlic cloves
  • Small handful of cilantro
  • ½ cup vinegar
  • * Splash of chili water
  • Salt and pepper
Instructions
  1. Soak your peppers in hot water for 30 minutes
  2. Either in a bowl weighed down so chili's are submerged or in a ziplock bag
  3. When chili's are done pull off stems and discard
  4. Also discard any seed and veins that come with stems
  5. Combine all ingredients into a blender and blend till smooth
  6. Serve immediately.
Notes
If your worried about it being too hot, generic add some lime juice and or decrease the amount of Habanero peppers.

* Chili water is the water you soaked the chili's in.

Hot Sauce Mania!

Hot sauce of the week! We shared a new red pepper hot sauce last week and decided to feature a new one every week! We will start out with an easy one. It’s not spicy, link just smokey and delicious. Perfect for that person who can’t handle the heat but wants a great sauce for their tacos or eggs in the morning. Or if you just want to easy into the heat.

Chili's and hot sauce

Easy Lay
Author: 
Cuisine: Condiment
Prep time: 
Cook time: 
Total time: 
 
Ingredients
  • 4 Dried Pasilla
  • 5 Dried Puya
  • 4 Dried Arbol
  • 1 Jalapeño
  • 1 clove of garlic
  • ½ cup of vinegar
  • Salt and pepper
Instructions
  1. Soak dried peppers in a bowl of hot water for 30 minutes.
  2. Make sure peppers are completely submerged.
  3. I use a heavier smaller blow for this
  4. Or you can use a ziplock bag.
  5. Just make sure it is on a flat surface and you flip it half way through .
  6. Once peppers have soaked pull off stems and discard them.
  7. Some seeds and veins will come with the stems and that's fine.
  8. Not all your peppers will be completely soft, approved that is ok.
  9. Take the chili's, more about garlic, vinegar and blend, adding salt and pepper to taste.
  10. Once done put sauce through a sieve to remove excess solids
  11. Take sauce and put in your favorite jar or container.
  12. Discard leftover solids*
Notes
* if your anything like us chances are you don't like to waste things. As we kept making hot sauces, one thing was bothering us. What to do with the left over solids? We think we are coming up with some great ideas. And if you stay tuned we will share our discoveries.


It’s Getting Hot in Here

It’s hot sauce mania here at The Lab.  We have been obsessed you could say.  It all started with Christmas and has spilled over.  Our latest sauces have been gobbled up by everyone and it seems there is not stopping us or them.  I can’t believe it started with just wanting to make something nice for Christmas that wouldn’t break my bank account.  We are really honing our skills, patient and what we want out of the sauces.  From mild and smokey, order to oh my god get me a bucket of water!  Our latest is a smoked red pepper hot sauce that has that sweetness of peppers and heat from some red Jalapeño’s.   It was inspired by a restaurant in LA that makes the most amazing yellow pepper dipping sauce.   One day I will crack that recipe!  Here is one of the new ones, enjoy!  Oh and don’t forget the homemade corn chips!!!

20140203-232842.jpg


20140203-232900.jpg


Red Hot Red Pepper Sauce
Author: 
Recipe type: Sauces
Prep time: 
Total time: 
 
Ingredients
  • 6 red peppers
  • 2 garlic cloves
  • 1 red Jalapeño
  • ¼ white onion
  • Small handful of cilantro
Instructions
  1. Slice peppers in half lengthwise.
  2. Place on shallow pan in broiler, skin side up.
  3. Or line bottom of broiler with foil.
  4. Cook peppers til skin is black on most of the pepper.
  5. Check regularly so as not to burn peppers or housed down!
  6. When peppers are done place on plate to cool.
  7. In the meantime, Chop onion, garlic, jalapeño, cilantro and put in blender or food processor.
  8. Peel skin off peppers and put them with the rest of the ingredients.
  9. Blend till smooth
  10. Salt and pepper to taste.
  11. Serve warm or cold.
Notes
You can also roast peppers directly on stove tops open flame, but this is only for experienced cooks.


Lasagna

Lasagna! Filling Onions, <a href=website like this celery and bay leaf” src=”https://houseofzeta.com/wp-content/uploads/2014/01/image-300×225.jpg” width=”300″ height=”225″ />


With winter setting in, ask we all want to hunker down and eat.  And what better way then with a big ole piece goodness called lasagna?!  Do you make it at Christmas or New Years, or whenever you want that giant casserole dish of baked noodles with sauce and cheese?  Do you add meat or vegetables?  Maybe you’re a white sauce kind of person?  For me, it all comes down to one thing, tomato sauce.  It screams lasagna.  All red and bubbly with veggies and Italian sausage, yum!

I usually start with one large and one medium can of whole tomatoes.  Giving them a medium rough chop so you have nice chunks of tomato.  Then I saute onions, garlic and whatever vegetables I want in my sauce, like celery and bell peppers, all seasoned with the herbs I’m using in the sauce.  I find it helps get things going.  If I am adding sausage, I cook the veggies in with the sausage, onions and garlic first then the rest.  Next I combine the tomatoes, veggies, meat and simmer for a few minutes then add some paste to thicken.  More herbs and simmer for as long as necessary.  I even slice zucchini to put in between the layers.

When it comes to cheese, fresh is best.  But we all know we can’t always get it or have the time to make it.  So do your best and it will be just fine.  I do stir up my ricotta if it comes store bought, makes it easier to spread or drop.  But my big discovery is to grate most or all of your mozzarella, which can be evenly distributed.  This will keep you from having that moment when you accidentally sliced it too thick and don’t have enough to cover the top.  Oops!  Been there done that! And who ever thought of cottage cheese as a substitute for ricotta should be shot.  Don’t do it ever! You are not doing yourself or your guests any favors.

Then there is the debate on the noodles.  Fully cook, don’t cook, cook partially.  What do you do?  Ive done all three.  I prefer to cook them al dente so they finish with the flavors of the sauce.  Also cook and extra one or two just in case one rips.  If not then have fun eating it while the lasagna cooks.

Once you have done all this, simply put it in the oven at 350 till golden bubbly, about 30-45 minutes and when done, let it stand for about 15 minutes and serve.   What could be more perfect and easy then that?

*if you think you need more sauce, always add another can of tomatoes, medium or large depending on how saucy you want your lasagna.  Or add another dollop of paste to thicken.*

Teriyaki. Simple & easy. So why does everyone screw it up?

I’ve been making Teriyaki sauce for years now.  I learned it from my old roommate Lisa.  We were living together when she was in college and she used to make all kinds of amazing food.  Thanks to her and her fried rice, Spam will forever have a place in my pantry, along with Panko.  I used to watch her in fascination as she took ordinary ingredients and turned them into amazing meals.  In a way it helped reignite my love of cooking.  I got disenchanted for a brief moment when I went vegan.  At that time soy products sucked.  So I left my Veganism behind and dove back into carnivore land.  Just in time to enjoy some Hawaiian/Japanese comfort food.  There was was Ramen with an egg dropped in, Spam fried rice, Coroke, and my favorite Chicken Teriyaki.  I have been making these dishes ever since, especially the Chicken Teriyaki.  It has become a staple in my dinner party cannon.

Once you try this you will never order it in a restaurant again.  I have ruined many a persons teriyaki experience with this recipe.  In a good way.  You can change it to your taste, sweet, salty, garlicky, gingery.  What ever way you want to go.  I tend to go heavier on the soy sauce and ginger and garlic.  I don’t like super sweet teriyaki sauce.  When I make for friends I make it how I want it and they usually have that moment of, why does everyone make such a sweet sauce? So here is what I do.  Be adventurous and don’t be scared it’s easy.

Ingredients:

Soy Sauce

Brown Sugar

Garlic(fresh)

Ginger(fresh)

I start with soy sauce and add brown sugar (remember we want a savory sauce so more soy then sugar).  I then add chopped garlic and chopped ginger.   Simmer for a few minutes to thicken and then place the chicken in a baking dish, add sauce on bottom of dish and on top of the meat and bake for about 45 minutes, turning a couple of times.   I use chicken thighs, they soak up the sauce best.   Cook rice and some veggies and you have an amazingly easy dinner.


« Older posts Newer posts »

© 2024 House of Zeta

Theme by Anders NorenUp ↑