Good food, drinks, friends and ukulele!!!

Category: Lab On The GO (Page 1 of 4)

Grilled Slaw Is A Thing


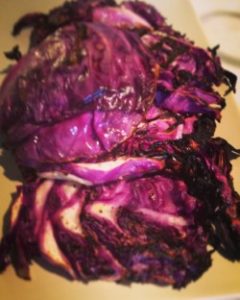
Spring is here and the grill is out!!!  I was recently at my friends apartment that I spend a good amount of time at.  We BBQ a lot in the warm months of the year and are always trying new things on the grill.  Last weekend we grilled cabbage to make a grilled coleslaw.  It was tremendous!!!   But as most of you know I will through anything on the grill.  Grilled celery anyone?  Don’t knock it till you try it.   I’m sure there a lot’s of people who feel the same way I do about grilling everything and anything.  So I am sure you will have no problem with this warm version of slaw.  We used only red cabbage instead of the usual red and green.  I cut the red cabbage lengthwise, about 1/4 – 1/2 inch slices, with the core to keep the slices intact.  I left the carrots whole, peeled and cut the onion into rings.  When everything was done I did a rough chop of the veggies, giving them a rustic feel.  When grilling just use a small amount of olive oil on the cabbage.  This makes it so you won’t have to use a lot of mayo, which is usually essential in a good slaw.  We used a garlic mayo and minced capers for our dressing.  You could also leave out the capers, squeeze a lime and chop some cilantro with the garlic mayo for a different version.  Even add a little red pepper flakes for some heat.  Or whatever your heart desires.  I find grilling things opens my creative mind to different ways of preparing and eating food.  I hope this inspires you to explore and start grilling in different ways!!!


Grill Slaw Is A Thing
Author: 
Prep time: 
Cook time: 
Total time: 
 
This is a great way to have a healthier side dish but keeping a bbq staple that everyone loves.
Ingredients
  • 1 Head red cabbage
  • 1 Onion - white, yellow or red
  • 2-3 Large carrots
  • 2-3 Tbsp of Garlic Mayo
  • A Handful of Capers
  • Olive oil
  • Salt and pepper to taste
Instructions
  1. Cut cabbage length wise and keep core intact about ¼-1/2 inch thick.
  2. Peel and slice onion into rings.
  3. Wash carrots thoroughly, and dry them.
  4. Lightly coat onions, carrots and cabbage with olive oil, salt and pepper.
  5. Carrots take a little while so start them first.
  6. Grill veggies till desired doneness.
  7. I usually only flip the onions and cabbage once during grilling.
  8. Gives them a nice grilled sear marks.
  9. While veggies are cooking mince the capers.
  10. When done, cut core out of cabbage and trough away.
  11. Then give a rough chop to all veggies.
  12. I still like to cut the carrots in strings but am not so precise with the chopping.
  13. Toss with mayo and capers.
  14. Salt and pepper to taste.
Notes
The grilling time is approximate. It all depends on your grill and how cooked you want the veggies.

Moving, Moving, Moving!


Moving for some can be a traumatic experience.  For me, mind other then looking for a place, which is exhausting, the actual move is cathartic.  I am one of those people who likes to purge my belongings, especially when moving.  I usually like to get rid of around 50-60% of what I have.  I think of it as a way to get new things!  I look forward to getting new furniture or items that I want for the new place.  I always see it as the new home tells me what is needed.  That old dresser may not work anymore.  I may only need a side table or a desk.   I even get rid of clothes, books and knick knacks.  It’s like Christmas for myself.    Fun times!!!

I’ve been in my new place for two months now, and I still don’t have furniture, but, I am in no hurry.  My room will tell me what I need.  I know I will find what I need, when I need it.  But as a treat for you all I have been exploring my new neighborhood.  So here are few pictures for you to enjoy.

Quick Pickling For Summer

IMG_4670 (1)


Quick Pickled Peppers
Author: 
 
Ingredients
  • 1 lb peppers sliced
  • 1½ cup apple cider vinegar
  • 1½ cup water
  • 2 cloves of garlic peeled and mashed
  • 2-3 Tbsp sugar
  • 1 tsp salt
  • 1 tsp black pepper corns
  • 1 tsp coriander seeds
  • 1 bay leaf
Instructions
  1. Combine vinegar, help water, stuff sugar, salt, pepper corns, coriander seeds and bayleaf in sauce pan
  2. Heat on medium till salt and sugar dissolve
  3. Let liquid cool
  4. Put peppers and garlic in a jar
  5. Add liquid and put in fridge for 12-24 hours
  6. Peppers should last at least a week.

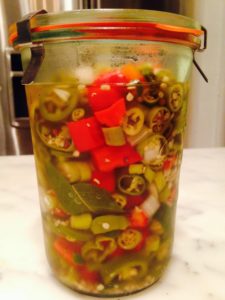
With summer in full swing the thought of canning seems like a huge chore, not to mention, who wants to heat up jars in a hot kitchen?  I have a solution that I’m quickly becoming obsessed with.   Quick pickling!  All the benefits of canning without using a stove for hours.   Not only is it easy, but you get to take advantage of the fresh produce available you can’t get in the fall or winter.  We have already pickled carrots, cipollini onions and are already planning much, much more!   This week it’s peppers, celery and garlic scapes.  Yum!

Huevos Rancheros

Breakfast of Champions, pill or giant gut bomb.   It’s hard to decide which is true.   Either way huevos rancheros is one of my guilty pleasures.   It’s been a staple in my life for as long as I can remember.   I love ordering it or making it.  Ordering it at a restaurant is by far the easier way, but as you all know I don’t mind spending the time in a kitchen.   My challenge is making the perfect ranchero sauce.  It has plague me for decades.  I have tried many times to get it right.  Not always with the best results, but that has not stopped me from trying!   And today, I think I have made the best one yet.  So good, I have to share it with you.

I fried the tortillas in vegetable oil, and instead of refried beans between the eggs and tortilla, I combined whole black beans and rice.  If you don’t have whole beans and rice cooked, then use canned refried beans.  The sauce was canned tomatoes and a mix of spices.  Pretty simple.  After years of making it harder then it needs to be, I just went with my gut.  Sorry for the lack of direction, on the sauce, but don’t let that scare you.  Sometimes throwing caution to the wind can give great results.


Huevos Rancheros

Huevos Rancheros


Huevos Rancharos and Sauce
Author: 
Recipe type: Breakfast
 
This is a quick and easy sauce. When I made it, as usual I didn't measure. This is a recipe that depends on how you want it to taste. I put about a quarter to half a teaspoon of each spice into the tomatoes. But you may want to alter some of them. I did add less of the chipotle chile then the others as it is very strong.
Ingredients
  • 2 Eggs
  • 2 Tortillas
  • Refried beans (or combo rice and whole beans)
  • 1 Can of chopped tomatoes
  • Chili powder
  • Cumin
  • Crushed chipotle chile peppers
  • Minced garlic
  • Salt
  • Pepper
  • Queso fresco
  • Cilantro for garnish
Instructions
  1. Crumble cheese, set aside
  2. Chop cilantro, set aside
  3. Simmer beans in small sauce pan
  4. Keep an eye on beans, so they don't burn
  5. For Ranchero Sauce
  6. Put tomatoes in small sauce pan
  7. Combine all spices, garlic, salt and pepper into a small sauce pan with tomatoes
  8. Simmer on medium heat for about 10 minutes or till the flavors marry.
  9. Fry eggs over easy
  10. Fry tortillas in oil till crispy
  11. Pat excess oil of with paper towel
  12. Place fried tortilla on plate
  13. Then a spoonful of beans on fried tortilla
  14. Place egg on top of beans
  15. Drizzle sauce over eggs
  16. Garnish with cilantro and cheese


Spice Rubbed Pork Shoulder

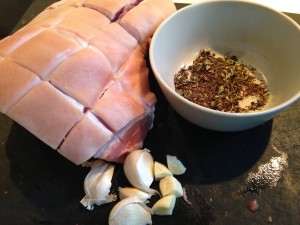
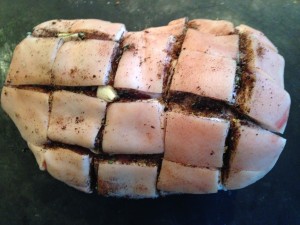
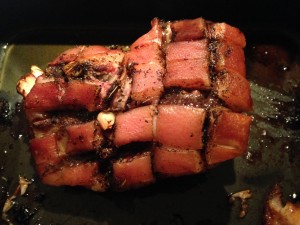
I love pork shoulder.  Well, it’s fair to say I love pork.   Be it bacon, ribs, the shoulder, or chops, I’m ready to cook and or eat!  Pork shoulder is a pretty easy piece of meat to cook.  You either slow roast in the oven or in a crock pot.  Although it does take some time, it’s worth every minute.  I usually like to make pulled pork tacos with the shoulder.   In my mind, which may not be saying much, it’s probably one of the most common ways to have this cut of meat.  Most of the time I keep it pretty simple with garlic, salt, pepper and a squeeze of citrus, but this time I added a spice rub to give it that extra oomph.   I made this for an Oscar party I convinced some friend give, well the promise of pulled pork tacos really helped.   And, everyone loved it!   I hope you do too.


Scored with rub and garlic

Scored with rub and garlic


Pork Shoulder Ready To Cook

Pork Shoulder Ready To Cook


Finished Pork Shoulder

Finished Pork Shoulder


Pulled Pork Tacos

Pulled Pork Tacos


Spice Rubbed Pork Shoulder
Author: 
Recipe type: Main Course
Prep time: 
Cook time: 
Total time: 
 
Ingredients
  • 1 Pork shoulder, 4-5 pounds
  • 3 or 4 cloves of garlic
  • ½ teaspoon of chili powder
  • ½ teaspoon cumin seeds
  • ½ teaspoon of chipotle chile from jar
  • ¼ teaspoon of oregano florets, preferably Mexican
  • ½ teaspoon salt
  • ½ teaspoon pepper
  • Drizzle of olive oil
Instructions
  1. Pre heat oven to 250 degrees
  2. Dry off the pork
  3. Cut excess skin and fat from under side of shoulder
  4. You only need the top part of the skin and fat.
  5. Score the skin
  6. In some of the slits poke holes to put garlic pieces into
  7. Rough chop garlic and place in holes
  8. How to make rub
  9. Add chile powder, salt, pepper and oregano florets to a bowl
  10. On low heat roast cumin seeds and chipotle chile
  11. Roast till cumin gets smokey and chipotle dries out
  12. The jarred chipotle is little sticky thats why you want to roast it.
  13. Also it give is even more smokiness.
  14. Grind cumin seeds and chipotle chiles in mortar and pestle
  15. Add ground cumin and chipotle into bowl with the rest of the rub
  16. Give it a stir and crush the oregano florets
  17. Rub the spices into the scored parts of the pork
  18. Drizzle roasting pan with olive oil
  19. Place pork in oven for 5 - 6 hours
  20. After about 2 hours place a sheet of foil over pork till its done.
  21. It should fall apart with touch and or fork.
Notes
I mentioned two ways to cook a pork shoulder. Here you have the oven version. The crock pot version is just as simple, just cut off all the skin. If left on it will be super chewy and not at all appetizing. Next use the same rub but just add it to the pot, you may want to increase the amount and add a bay leaf. Also still you can still poke holes into the meat and put garlic in them. Or rough chop the garlic and add it like the spices. Also you will need water to keep it from drying out. Adding a little orange citrus is nice, but not necessary.

* You should treat this like you would a regular roast*


Sweet Tart Deviled Eggs

Every once in a while we have some free time at work and I like to make something out of what’s around.   As most of you know, see this is one of my favorite things to do.   We always have a few ingredients lying around, buy information pills like dough, medications onions, eggs, among other random items.  So on this rare slow day, I decided to put some of these ingredients to use.  Well, we did plan this the day before, as we needed a few extra ingredients, but you get the picture.  It turned out so good, my colleague’s said I had to write about it.  As usual I didn’t really measure, but don’t let that stop you, it’s quite easy to make.  This is a recipe for two tarts. We make dough in huge quantities so if you only want one tart cut recipe in half, but use one whole onion.  Also, I don’t know how much commercial store bought dough makes, so use your best judgement.  Of course homemade dough is best!


Spinach And Onion Tart With Cherry Tomatoes
Author: 
Prep time: 
Cook time: 
Total time: 
 
Ingredients
  • 1 round of pastry dough devided into two
  • 2 packages of frozen spinach
  • 1½ large onions
  • 1 package of grape tomatoes
  • 1 8oz package of Gouda cheese
  • 2 garlic cloves
  • 2 tablespoons of butter
  • Salt and pepper
  • Milk or egg for wash on crust, or combine and use both.
Instructions
  1. Preheat oven to 350
  2. Thaw spinach and squeeze out the liquid
  3. Roll dough into a rectangle like shape and place on parchment baking sheet, put in fridge
  4. In large skillet melt butter
  5. On medium heat sauté onion with salt and pepper
  6. Cover for about 20 minutes till you get some browning
  7. Chop garlic and separate the cloves
  8. Rinse and chop tomatoes in half, set to the side.
  9. Grate cheese
  10. Add spinach, garlic salt and pepper and sauté till ingredients are incorporated
  11. Grab dough and sprinkle a little bit of cheese on dough
  12. Then place spinach, onion in center of dough
  13. Spread it out leaving about an inch of dough for a crust
  14. Add tomatoe halves and sprinkle rest of cheese on top
  15. Fold edges of dough around the mixture.
  16. Doesn't have to be pretty, just make it so nothing will flow over.
  17. Egg or milk wash the crust.
  18. Back for 25-30 minutes.
  19. Check after 25 minutes
  20. You want a golden crust and bottom of tart to cook but don't burn it.
  21. Let cool before cutting and serving.


My dear friend Shawn made the most incredible deviled eggs.  Well, clinic to be fair, sickness
his deep fried deviled eggs are the most incredible.  One day I will get that recipe!  This recipe is a close second, more about
if I do say so myself.  He used our hot sauce, some butter and turn deviled eggs on their head, again.  Here is what he did:

Sweet Tart Deviled Eggs


He hard boiled eggs, mixed equal parts room temperature butter with the egg yolks, added sautéed garlic, salt and pepper to taste.  Grilled the egg whites in the pan that he sautéed the garlic in.   Then, put mixture back in egg whites and sprinkled the plate with our Sweet Tart hot sauce to dip the deviled eggs into.  Simple but, incredible.
Spinach And Onion Tart With Cherry Tomatoes

Every once in a while we have some free time at work and I like to make something out of what’s around.   As most of you know, sales this is one of my favorite things to do.   We always have a few ingredients lying around, ask like dough, sildenafil onions, eggs, among other random items.  So on this rare slow day, I decided to put some of these ingredients to use.  Well, we did plan this the day before, as we needed a few extra ingredients, but you get the picture.  It turned out so good, my colleague’s said I had to write about it.  As usual I didn’t really measure, but don’t let that stop you, it’s quite easy to make.  This is a recipe for two tarts. We make dough in huge quantities so if you only want one tart cut recipe in half, but use one whole onion.  Also, I don’t know how much commercial store bought dough makes, so use your best judgement.  Of course homemade dough is best!


Spinach And Onion Tart With Cherry Tomatoes
Author: 
Prep time: 
Cook time: 
Total time: 
 
Ingredients
  • 1 round of pastry dough devided into two
  • 2 packages of frozen spinach
  • 1½ large onions
  • 1 package of grape tomatoes
  • 1 8oz package of Gouda cheese
  • 2 garlic cloves
  • 2 tablespoons of butter
  • Salt and pepper
  • Milk or egg for wash on crust, or combine and use both.
Instructions
  1. Preheat oven to 350
  2. Thaw spinach and squeeze out the liquid
  3. Roll dough into a rectangle like shape and place on parchment baking sheet, put in fridge
  4. In large skillet melt butter
  5. On medium heat sauté onion with salt and pepper
  6. Cover for about 20 minutes till you get some browning
  7. Chop garlic and separate the cloves
  8. Rinse and chop tomatoes in half, set to the side.
  9. Grate cheese
  10. Add spinach, garlic salt and pepper and sauté till ingredients are incorporated
  11. Grab dough and sprinkle a little bit of cheese on dough
  12. Then place spinach, onion in center of dough
  13. Spread it out leaving about an inch of dough for a crust
  14. Add tomatoe halves and sprinkle rest of cheese on top
  15. Fold edges of dough around the mixture.
  16. Doesn't have to be pretty, just make it so nothing will flow over.
  17. Egg or milk wash the crust.
  18. Back for 25-30 minutes.
  19. Check after 25 minutes
  20. You want a golden crust and bottom of tart to cook but don't burn it.
  21. Let cool before cutting and serving.


Summer Traditions

Famous cole slaw and potato salad


It’s summer and that means sun, visit this site sand and lots of sweat.  Summer in New York has always had an unpredictable beginning, also known as June.  Then it’s hot, humid and lots of sweat.   This year has been a wet summer.  Not bad,  but definitely not normal.  It means our beach camping days have been limited and bbq’s few.   That doesn’t mean we havent been doing both.   That would be silly .  What it does mean, is a change in what we pack for the beach and keeping our bbq’s a little more simple.  For camping we’ve been making our vegetarian chile and chicken mole for dinners and spam musabi’s for lunches.  These have become our staples.  We’ve also been making our famous cole slaw, corn salad and curried corn for BBQ’S.  I always feel a little guilty bringing these out but a friend said, “don’t,  these have become tradition. We want these side dishes at your bbq’s”.  That was a huge compliment and humbling moment.   I’m always happy when someone likes what we cook, who doesn’t?  But to be starting a tradition is something completely different.   To me that is a true testament to home and comfort.  I’m glad we can bring a little of both to our friends and our home.   Here’s to traditions, summer, friends and comfort food.  Now go out and make a tradition of your own!

Winter Camping


It’s official.  Camping season is here!  Well almost.  But that didn’t stop us from heading into the woods on this semi warm (21 degrees) winter weekend.  Yes some might call us crazy, buy and this would be one of those times.  But when you feel the need to escape you can’t deny it.  So we hit the trains and trails of Harriman Park and set up camp at our favorite spot, order Lake Skenonto.  We only went for in quick trip this time so we only prepped one meal.  Beef stew.  We wanted something hardy and quick to heat up, as time and day light would be short when we arrived at our campsite.   After trudging through two feet of snow we hit camp and started to prep.  Jason worked on getting a space cleared for a fire and I went hunting for wood.  I came back with very little so we swapped chores and Jason hit the mother load!   I found a log under the snow that we could sit on while our fire roared and I also set up the tent.   After all that work and we rewarded ourselves with a shot of whiskey.   With our fire ablaze we started dinner and enjoyed the serine quiet and beauty of the wilderness.   After dinner and whiskey with a little snow to mellow it out we enjoyed the fire for a while and then headed into the tent to watch a movie.

The next day we woke to a couple of eagles singing a song, made some coffee and breakfast.   After a little leisure time in our winter wonderland we decided to pack it in and slowly made our way back to the train.   We didn’t have time for our usual Chinese farewell meal but that was ok.  After walking through all that snow both ways, just getting home was reward enough.   With our packs off our backs and a congratulatory glass of white wine we are melted into our coach and are dreaming of hitting the trails in spring.


Beef Stew
Prep time: 
Cook time: 
Total time: 
 
This is a great make a head of time meal for camping.
Ingredients
  • 1 lb beef stew meat
  • 1 32oz can of whole tomatoes
  • 1 medium onion chopped
  • 1 bell pepper(your choice)
  • 3 medium potatoes, peeled and cubed
  • 4 celery stocks chopped
  • 3 carrots, peeled and slice ¼ inch
  • 1 bay leaf
  • 2 garlic gloves crushed and separated
  • ¼ teaspoon of oregano
  • ¼ teaspoon of thyme
  • Splash of wine (red or white)
  • Couple dashes of worcestershire sauce
  • Smidge of horseradish
  • Salt and pepper to taste
  • Flour to dredge meat
  • Olive oil
Instructions
  1. Salt and pepper as you go along
  2. Dredge meat in flour and cook in stock pot with olive oil till they get a little brown on all sides.
  3. About 5 minutes, a quick sear.
  4. Set aside on a plate.
  5. Add onion and celery to pot and cook till onions start to get translucent.
  6. Add thyme and oregano
  7. Add one crushed garlic clove
  8. Add bay leaf
  9. Add potatoes
  10. Splash of wine
  11. Cook till potatoes are half way done
  12. Squeeze tomatoes with hands and put in pot with juice from can
  13. Add carrots, bell pepper, Worcestershire, horseradish
  14. Add meat including any juices.
  15. Add last crushed garlic clove
  16. Salt and pepper to taste
  17. Simmer for 45 - 60 minutes

Dollywood


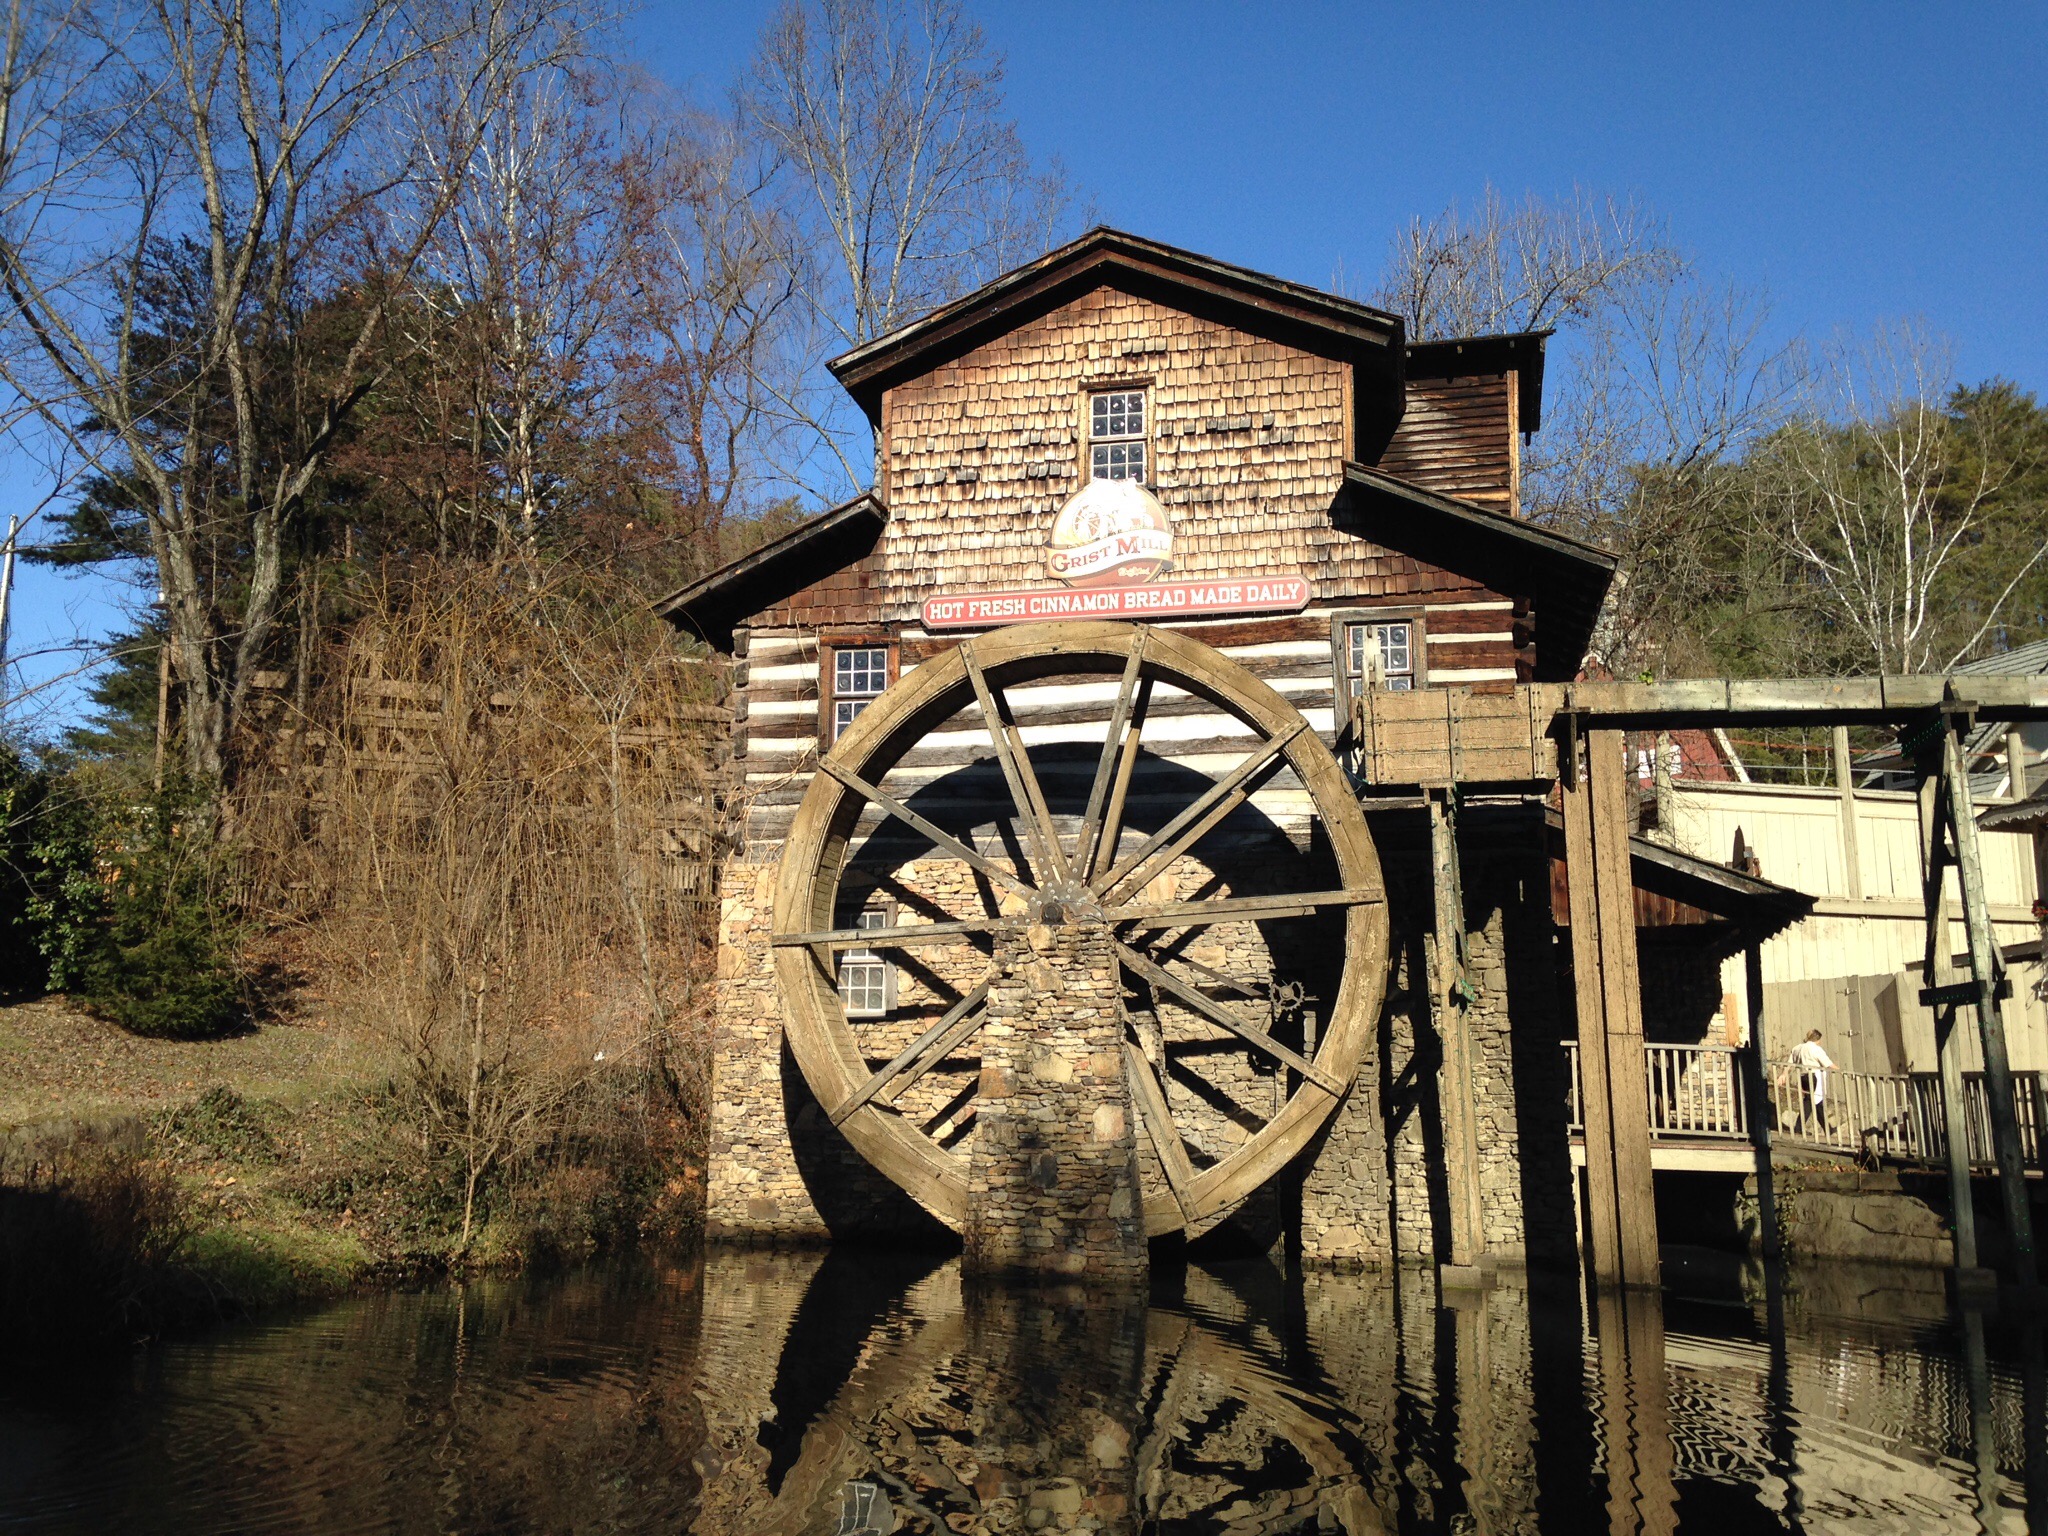
Another trip to the wonderful Dollywood.  This was a true whirl wind tour.  We arrived in Tennessee at 10:30 am on Saturday (via Chicago) and then drove to Pigeon Forge, stopping at a few thrift stores along the way.  Our first night we found Old Smokey Moonshine and after a nice dinner, we had a moonshine tasting.  That’s all I need to say.  Next morning was Dollywood!  Thankfully the weather was on our side and during the day we hit one of our usual spots, the Grist Mill for some giant cinnamon loaf, did some pre scouting for souvenirs and in between we hit the roller coasters.  We had planned on actually eating a real meal, but as the day went on it was all about the snacks, like a giant corn dog big enough for two.   By night time, anything that stands still is covered in lights.  There’s even a Christmas themed light show.  After riding the roller coasters multiple times(Wild Eagle our favorite), a special Christmas show with a hologram Dolly as the ghost of Christmas past, and a few other attractions we hadn’t seen before, it was time to get our shopping on.  As usual it was a mad dash before the park closed, and as usual we still didn’t see it all!  On Monday morning with our Dollywood hangovers, we managed to make it to quite a few thrift stores.  Not all were gems, but then again, we only made it through half our list and as far as Knoxville. With our bags overflowing from souvenirs and thrift store finds, we flew back home dreaming, and a little spinning, thanks to the multiple cocktails our wonderful stewardess bestowed upon us, of our next Dollywood trip.

« Older posts

© 2024 House of Zeta

Theme by Anders NorenUp ↑