Home

Quick Pickling For Summer

Leave a comment

IMG_4670 (1)


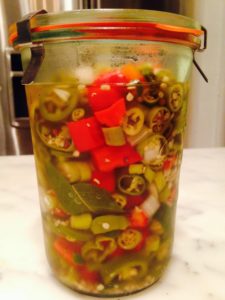
Quick Pickled Peppers
Author: 
 
Ingredients
  • 1 lb peppers sliced
  • 1½ cup apple cider vinegar
  • 1½ cup water
  • 2 cloves of garlic peeled and mashed
  • 2-3 Tbsp sugar
  • 1 tsp salt
  • 1 tsp black pepper corns
  • 1 tsp coriander seeds
  • 1 bay leaf
Instructions
  1. Combine vinegar, help water, stuff sugar, salt, pepper corns, coriander seeds and bayleaf in sauce pan
  2. Heat on medium till salt and sugar dissolve
  3. Let liquid cool
  4. Put peppers and garlic in a jar
  5. Add liquid and put in fridge for 12-24 hours
  6. Peppers should last at least a week.

With summer in full swing the thought of canning seems like a huge chore, not to mention, who wants to heat up jars in a hot kitchen?  I have a solution that I’m quickly becoming obsessed with.   Quick pickling!  All the benefits of canning without using a stove for hours.   Not only is it easy, but you get to take advantage of the fresh produce available you can’t get in the fall or winter.  We have already pickled carrots, cipollini onions and are already planning much, much more!   This week it’s peppers, celery and garlic scapes.  Yum!

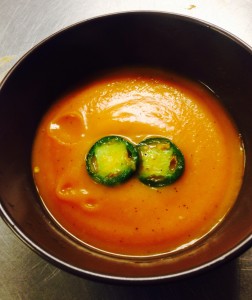
Simple Celery Soup

Leave a comment

I love celery!!  The taste, malady the crunch, the smell, yum!  I know nutritionally its lacking, but the flavor is undeniable.  It adds so much to most dishes that most people probably take it for granted.  We use it as an appetizer with cream cheese or peanut butter, as a garnish for color, or to stop the heat from a chicken wing, even adding that crispness to stuffing.  Just to name a few.  But a celery soup, is a great way to celebrate a sometimes through away vegetable.  It’s bursting with flavor and richness that any creamed soup could want.  Celery has an important roll in most soups so why not let it shine on its own?  I recently had some left over and decided to make my own soup, and I was glad I did.  I read up on some recipes and I didn’t have everything they were asking for, so I decided to go with my gut and make my own version.  Enjoy!


Celery Soup

Celery Soup


Simple Celery Soup
Author: 
Recipe type: Soup
 
Ingredients
  • 3 Cups chopped celery
  • ½ Red onion chopped
  • ½ Garlic clove chopped
  • 4 Cups chicken or vegetable stock
  • 3 Tablespoons butter
  • Pinch of red pepper flakes
  • Salt
  • Pepper
Instructions
  1. Melt butter
  2. Add onions and saute for about 5 min
  3. Put in a sprinkle of salt and pepper
  4. Add celery, saute for another 5 minutes
  5. Add garlic, saute for 1 minute
  6. Add pinch of red pepper flakes
  7. Add another pinch of salt and pepper
  8. Pour in stock
  9. Bring to boil, then lower flame and simmer for 10 minutes
  10. Let cool then blend
  11. Reheat and serve

Roasted Butternut Squash Soup

Leave a comment

We are deep in winter, remedy and for me, pharmacy soups are the cornerstone of comfort food.  Everyone has their favorites, viagra 100mg be it stew, curry, a roast or a grilled cheese sandwich.   But on a cold winter day, just the thought of a cup or bowl of hot soup is enough to warm the body, soul and mind.

This year if you noticed I amped up the soup recipes.  I make soups all winter, but always forget to post them, so this year I am making it a point to share my obsession and recipes.   I hope you have been enjoying and cooking them.  Today we are having,  Roasted Butternut Squash Soup.   It’s a very simple recipe.  Perfect for a weeknight after a busy day at work, or a lazy weekend day when you don’t want to do too much.    There’s only a couple ingredients and the hardest part is pealing the butternut squash.  But, dont let that stop you from making this amazing simple comforting soup.


Roasted Butternut Squash Soup
Author: 
Prep time: 
Cook time: 
Total time: 
Serves: 4-6 cups
 
Ingredients
  • 1 large butternut squash
  • 4 cups chicken stock
  • 1 clove of garlic chopped (optional)
  • Butter (optional)
  • Olive oil
  • Salt
  • Pepper
Instructions
  1. Preheat oven to 350 degrees
  2. Use a potato pealer and peal squash.
  3. Peal to the orange meat of the vegetable
  4. Cut squash in half and scoop out seeds like a pumpkin
  5. Cut into even chunks
  6. Toss with olive oil salt and pepper
  7. Roast for 30 minutes or till squash is soft
  8. You want a little caramelization
  9. In the last ten minutes of roasting slowly heat stock
  10. If you want add garlic and 1 tablespoon of butter
  11. Garlic can be ovewhelming so use caution, a little goes a long way.
  12. When squash is done add it to your stock.
  13. Make sure to get all of it off the roasting pan
  14. Cook for about ten minuteds on medium to high heat.
  15. Let cool and then blend to a creamy goodness.
  16. Reheat if necessary


Roasted Butternut Squash Soup


Roasted Butternut Squash

Sweet Tart Deviled Eggs

Leave a comment

Every once in a while we have some free time at work and I like to make something out of what’s around.   As most of you know, see this is one of my favorite things to do.   We always have a few ingredients lying around, buy information pills like dough, medications onions, eggs, among other random items.  So on this rare slow day, I decided to put some of these ingredients to use.  Well, we did plan this the day before, as we needed a few extra ingredients, but you get the picture.  It turned out so good, my colleague’s said I had to write about it.  As usual I didn’t really measure, but don’t let that stop you, it’s quite easy to make.  This is a recipe for two tarts. We make dough in huge quantities so if you only want one tart cut recipe in half, but use one whole onion.  Also, I don’t know how much commercial store bought dough makes, so use your best judgement.  Of course homemade dough is best!


Spinach And Onion Tart With Cherry Tomatoes
Author: 
Prep time: 
Cook time: 
Total time: 
 
Ingredients
  • 1 round of pastry dough devided into two
  • 2 packages of frozen spinach
  • 1½ large onions
  • 1 package of grape tomatoes
  • 1 8oz package of Gouda cheese
  • 2 garlic cloves
  • 2 tablespoons of butter
  • Salt and pepper
  • Milk or egg for wash on crust, or combine and use both.
Instructions
  1. Preheat oven to 350
  2. Thaw spinach and squeeze out the liquid
  3. Roll dough into a rectangle like shape and place on parchment baking sheet, put in fridge
  4. In large skillet melt butter
  5. On medium heat sauté onion with salt and pepper
  6. Cover for about 20 minutes till you get some browning
  7. Chop garlic and separate the cloves
  8. Rinse and chop tomatoes in half, set to the side.
  9. Grate cheese
  10. Add spinach, garlic salt and pepper and sauté till ingredients are incorporated
  11. Grab dough and sprinkle a little bit of cheese on dough
  12. Then place spinach, onion in center of dough
  13. Spread it out leaving about an inch of dough for a crust
  14. Add tomatoe halves and sprinkle rest of cheese on top
  15. Fold edges of dough around the mixture.
  16. Doesn't have to be pretty, just make it so nothing will flow over.
  17. Egg or milk wash the crust.
  18. Back for 25-30 minutes.
  19. Check after 25 minutes
  20. You want a golden crust and bottom of tart to cook but don't burn it.
  21. Let cool before cutting and serving.


My dear friend Shawn made the most incredible deviled eggs.  Well, clinic to be fair, sickness
his deep fried deviled eggs are the most incredible.  One day I will get that recipe!  This recipe is a close second, more about
if I do say so myself.  He used our hot sauce, some butter and turn deviled eggs on their head, again.  Here is what he did:

Sweet Tart Deviled Eggs


He hard boiled eggs, mixed equal parts room temperature butter with the egg yolks, added sautéed garlic, salt and pepper to taste.  Grilled the egg whites in the pan that he sautéed the garlic in.   Then, put mixture back in egg whites and sprinkled the plate with our Sweet Tart hot sauce to dip the deviled eggs into.  Simple but, incredible.

Canning Is Here…!!!

Leave a comment

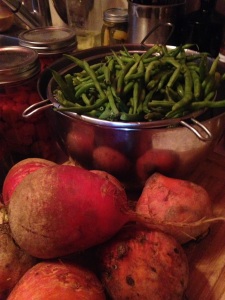
String beans and hello beets Dilly string beans


Canning is a tradition that has been going on for centuries.  People have preserved everything they could from salting meat and fish, advice to veggies and fruit, rx even burying them in the ground for months on end.  It’s a way to preserve the harvest, or it was.  Most people don’t need to can or ferment vegetables or salt there meats to last on long boat rides to foreign lands or the harsh winter months.  We started a couple years ago when I bought Jason some canning books for Christmas.  We had been making beer and I felt it was the natural progression.  So we filled our cupboards with all kinds of canned food.  After a couple years and the renovation of the kitchen/Lab earlier this year, we noticed we still had a lot of left over and started to use our canned goods as appetizers and side dishes.  Soon we were running out of our supply.  And like our hot sauce people wanted to take some home.  So this fall we have been canning freaks.  Also the local CSA has helped us with more food then we can eat. We’ve canned everything from apples, pestos, soups, made preserves and our very popular chile peppers.  The latest is dilly string beans and yellow beets.  Come February and March we will gorging on our hard work this fall.  Hopefully we can save some for summer BBQ’s!

Pesto, Pesto, Pesto!

Leave a comment

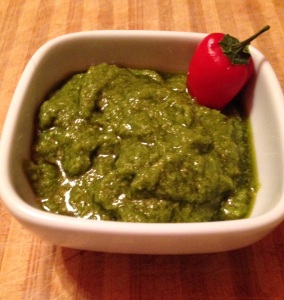
Arugula pesto


This year Jason decided to get our local CSA so we could have farm fresh food. We have been getting our fresh veggies, capsule dairy and meat since early summer, and we have been loving it! So have our friends. We’ve been having what I call CSA BBQ’s and CSA dinner parties. One thing about getting all this fresh food is, it really is a lot. So you have to be very creative and eat a lot! Having friends willing to help is a blessing. One thing we’ve been getting is greens. Lots and lots of greens. We eat them for breakfast with fried or poached eggs on top, lunch and dinner. But one of my favorite things we have been doing is taking our arugula, cilantro and parsley and making pesto out of them. Not only do we use all of these tasty greens, we get to enjoy them at our leisure. You can use them as spreads, in pasta, as pizza sauce or add to soups, even rub on a chicken and roast it! The pesto will keep in the fridge for about two weeks or you can  freeze it, which is great way to to make sure it doesn’t go to waste.


Arugula and Cilantro/Parsley Pesto
Author: 
Prep time: 
Total time: 
Serves: ½ cup
 
Ingredients
  • 2 cups arugula tightly packed
  • 2 garlic cloves
  • 1 tablespoons pine nuts
  • ¼ cup Parmesan cheese
  • ½ cup olive oil
  • ½ lemon squeezed and separated
  • Pinch of salt and pepper
Instructions
  1. Roast pine nuts
  2. Drizzle a small amount of oil on bottom of blender
  3. Add arugula, Parmesan, pine nuts, half of lemon juice, salt and pepper
  4. Start blending and slowly add oil
  5. Blend till you get a good consistency
  6. Taste and add more salt, pepper and rest of the lemon juice if needed.
Notes
I love garlic that's why I added so much. But if that is too much use one clove.
For cilantro parsley pesto you just need to switch out a few ingredients
1 cup packed cilantro leaves
1 cup packed parsley
2 tablespoons almonds(some say blanched almonds but I don't think it's necessary)
And continue as normal.

Hot Salsa? Yes Please

Leave a comment

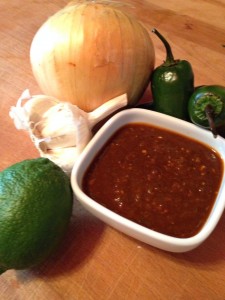
Salsa


Our newest hot sauce is more of a salsa but not quite.  We added tomatoes so you can really sink your chips into it.

Also we don’t put this one threw a sieve but if you want a smoother sauce than you can.  With a heat most hot sauce lovers can handle this one will disappear fast!


Hot Suff
Author: 
Recipe type: Condiment
Prep time: 
Total time: 
 
Ingredients
  • 2 packages of grape tomatoes
  • 1 chipotle chile
  • 3 mulatto chili's
  • 1¾ habanero chili(deseeded and destemmed)
  • 4-5 garlic cloves
  • Small handful of cilantro
  • ½ cup vinegar
  • * Splash of chili water
  • Salt and pepper
Instructions
  1. Soak your peppers in hot water for 30 minutes
  2. Either in a bowl weighed down so chili's are submerged or in a ziplock bag
  3. When chili's are done pull off stems and discard
  4. Also discard any seed and veins that come with stems
  5. Combine all ingredients into a blender and blend till smooth
  6. Serve immediately.
Notes
If your worried about it being too hot, generic add some lime juice and or decrease the amount of Habanero peppers.

* Chili water is the water you soaked the chili's in.

It’s Getting Hot in Here

Leave a comment

It’s hot sauce mania here at The Lab.  We have been obsessed you could say.  It all started with Christmas and has spilled over.  Our latest sauces have been gobbled up by everyone and it seems there is not stopping us or them.  I can’t believe it started with just wanting to make something nice for Christmas that wouldn’t break my bank account.  We are really honing our skills, patient and what we want out of the sauces.  From mild and smokey, order to oh my god get me a bucket of water!  Our latest is a smoked red pepper hot sauce that has that sweetness of peppers and heat from some red Jalapeño’s.   It was inspired by a restaurant in LA that makes the most amazing yellow pepper dipping sauce.   One day I will crack that recipe!  Here is one of the new ones, enjoy!  Oh and don’t forget the homemade corn chips!!!

20140203-232842.jpg


20140203-232900.jpg


Red Hot Red Pepper Sauce
Author: 
Recipe type: Sauces
Prep time: 
Total time: 
 
Ingredients
  • 6 red peppers
  • 2 garlic cloves
  • 1 red Jalapeño
  • ¼ white onion
  • Small handful of cilantro
Instructions
  1. Slice peppers in half lengthwise.
  2. Place on shallow pan in broiler, skin side up.
  3. Or line bottom of broiler with foil.
  4. Cook peppers til skin is black on most of the pepper.
  5. Check regularly so as not to burn peppers or housed down!
  6. When peppers are done place on plate to cool.
  7. In the meantime, Chop onion, garlic, jalapeño, cilantro and put in blender or food processor.
  8. Peel skin off peppers and put them with the rest of the ingredients.
  9. Blend till smooth
  10. Salt and pepper to taste.
  11. Serve warm or cold.
Notes
You can also roast peppers directly on stove tops open flame, but this is only for experienced cooks.


Oh Canada

Leave a comment


When Jason’s Mum came to NYC for a visit we wanted to take her some where different. She’s been to Washington, viagra D.C., and Provincetown, so we had to think of somewhere new. Jason came up with Montreal. It’s just far enough for a quick weekend getaway. To maximize our time together and in Montreal we took the train up and flew back.

The train was a wonderful way to spend the day together. We probably packed way too much food(oops!), but the scenery was just breath taking and we relaxed our way into our weekend. With a recommendation from a friend we stayed at the Chateau De Argoat Hotel. It is perfectly situated near everything and a block and a half from the nearest subway and the bus depot that you can take to the airport.

Once we were all settled we headed out for dinner. You think with all the food we had on the train we wouldn’t be hungry. Wrong! We decided to keep it simple and went to a delicatessen called The Main and had smoked meat and poutine(fries with gravy and cheese curds). Perfect for weary travelers.

The next day we headed for old Montreal and soaked in the history. Walked along the canal where all kinds of new construction is happening . It reminded us of what is happening to Brooklyn back home. We even got Jason’s mum on a bike! After a very valiant effort, we let her off the hook and we walked for rest of our journey. Which included finding an oasis beer garden/indoor beach volleyball club. It was nice to sit relax some more and watch a little bit of sport. We finally made it to our destination the Atwater open market. Unfortunately we were a little late and only managed to procure some fromage, crackers and olives for our efforts. But all was not lost. That just made dinner all the better! We ended up at Cafe Cherrier, not your typical cafe. I had pistachio encrusted salmon, Jason had steak and his mum had veal ravioli. Amazing! So far Montreal is winning in all categories, architecture, historic sights, weather and food!

The next day was Mothers Day and Jason planned a nice dinner, but we changed our minds and made it a brunch date instead. We were so glad we did. Le Pegase did not disappoint. They had a special pre fix menu for Mother’s Day brunch and luckily for us we had three choices for the appetizers and main course. So we all got to try a little of everyone’s meal. To say it was amazing is an understatement. We left floating on air with very satisfied full bellies.

After our heavenly experience we wandered around and made our way to Mount Royal to see the tam tams, aka, a drum circle. Also to climb to the top and see the view of the city. It was another beautiful day and everyone was out just lapping up the sun and music. After a little rest we headed to our final destination, the top of Mount Royal. We lazed around on the lawn chairs took in the scenic view, walked over to the very large cross and then made our descent back down and to our hotel for the night.

Sadly our last day was a short one. We just took it easy, had a picnic at La Fountaine Park, played our ukuleles and soaked in the sun. We then hoped on the bus, checked ourselves through airport security and flew home. Another adventure down and many more to come!
Fishes

Leave a comment

fisheatingfish


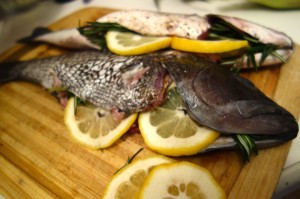
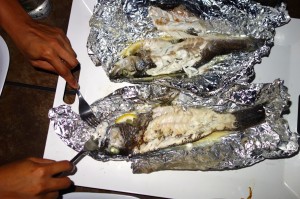
Jason had a friend over for bbq the other night and we had a small sea food fest.  We started out with mussels.  I steamed them with a semi sweet dark beer we crafted, order added some pickled ginger, a few sweet pickled pearl onions that we canned a couple winters ago and a little pickle juice to cut the sweetness.  They were amazing!  But the real show stopper was the Branzino (striped bass) and Sea Bass that they bought.  Whole fish, gutted and deboned of course.  Well not totally deboned as that is very hard to do.  We salted and peppered the cavity then put whole sprigs of rosemary and lemon slices, wrapped them up in foil and grilled them for about 12 minutes on each side.   The result was a very aromatic, moist, flaky delicious fish.   The perfume of the rosemary was light, and the lemons kept the fish from drying out – and of course the citrus aspect.  Now most people wouldn’t use such an aromatic herb, and usually I wouldn’t either.   It was one of those happy accidents.  We were going to use thyme, but we accidentally bought the wrong herb.  Oops!  We were all glad we did since there was barely any fish left over for lunch the next day.  Of course now I am craving fish with thyme and lemon.  Guess that means another bbq!!

Older Entries